A Virtual Local Area Network (VLAN) has many useful benefits, it allows machines to be logically connected or isolated independently of their physical location. I’ve been wanting to set-up VLANs in my home network stack for a while, and I’ll certainly need them for some upcoming projects. This was used to test the creation of a Guest VLAN that uses my home PiHole for DNS resolution, but can’t access any machines on my LAN. The guide below was written for PfSense 2.4.4
Here’s a quick guide on how to do it:
Create the VLAN
Head over to Interfaces -> Assignments -> VLANs and click ‘Add’ in the bottom right corner.

Input the parent interface, this is typically where the VLAN is expected to be physically located on, for me this is ‘em1’ which is my LAN. The VLAN tag is the identifier for the VLAN, this is used on your other network gear rather than a name. Add a description to make the job easier for yourself.
Create the interface
Next step is to assign the VLAN as an interface and enable it, Interfaces -> Assignments and add your VLAN to the interfaces. Next step is to click on the interface, to get to the management page.
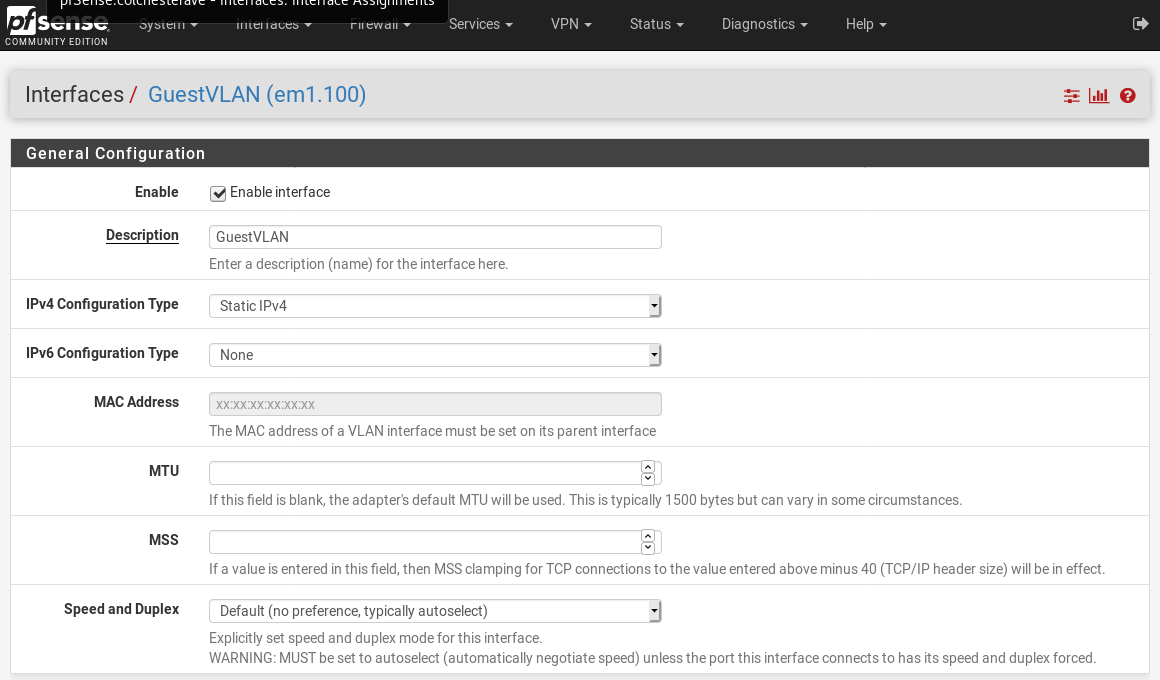
- Check the enable interface box
- Set the IPv4 configuration, for me this was static
- I’ve set the IPv6 as none, as I’m not using it at home yet
- Assign your IPv4 Configuration, for me, this is 10.100.0.1/24 with no gateway
- Hit save
Enable DHCP server
Next step for me is to enable the DHCP server on the VLAN. Head to Services -> DHCP Server -> $VLAN NAME$.

Enable the DHCP server on the VLAN interface, and create the DHCP pool size. For me, I’ve used 10.100.0.10 - 10.100.0.254 which will be more than enough for a home guest network. Everything else here is left as default, then hit save.
Setup Firewall rules
At this state, you should be able to join the VLAN and be assigned an IPv4 address in the pool. You shouldn’t be able to access anything outside the pool as there are no firewall rules automatically created. So that’s the next step, head to Firewall -> Filters -> $VLAN NAME$. The goal for this network is to be able to access anything on the internet, my home DNS server at 10.0.0.3 and nothing on the LAN so we’ll create the rules for that.
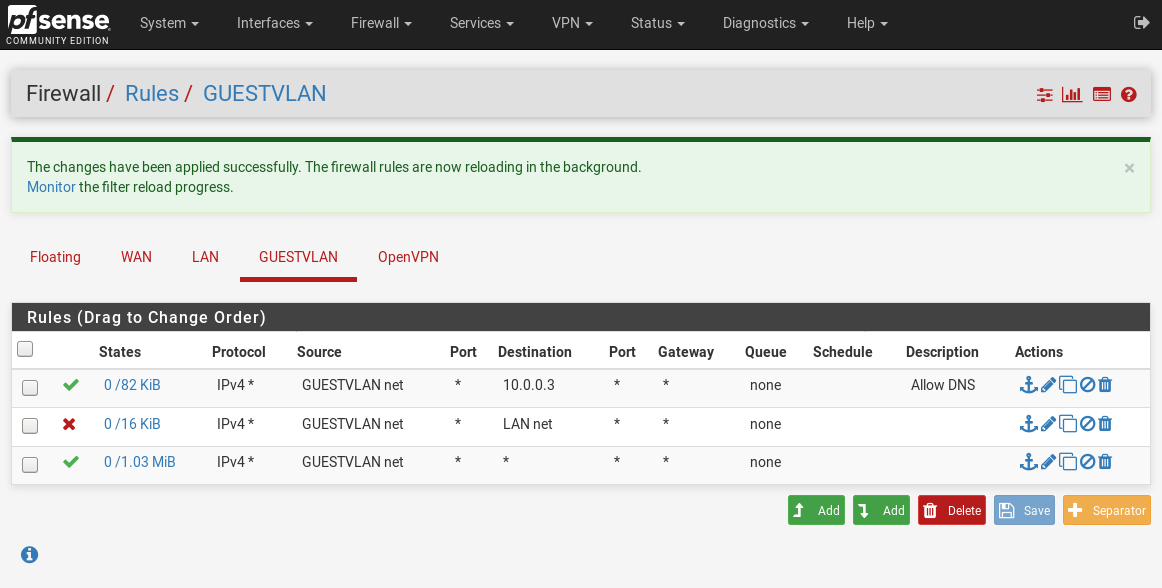
Firewall rules are activated from the top down for network traffic, so you’ll want your specific rules at the top in most cases. For me, the include 10.0.0.3 comes first, then block all traffic to LAN NET and finally allow all. Blocking traffic to LAN net covers all IP addresses that fall within the subnet of LAN, in this case, is 10.0.0.0/16; meaning all traffic in the range 10.0.0.0 - 10.0.255.254 is blocked. Finally, we enable all as the same rule applies to the WAN net, enabling traffic to the WAN net is only for the subnet of your provided IP address which would be incorrect, to access the internet we need to enable all traffic.
Voila! You should now have a VLAN that assigns IPv4 addresses to new clients and allows access to the internet. This is not the most complete guide and is also probably not the most secure, I’d recommend doing your own research as well.